Editing video the traditional way means hours on a timeline. You cut every silence by hand, fix audio levels clip by clip, and add captions frame by frame. I spent three years doing it that way before I tried describing the edit in plain language instead. The AI handled in seconds what used to take me an hour.
This guide contains video editing prompts that produce consistent results across current AI tools. I tested each one on real footage — social clips, YouTube long-form, and product demos — and kept only the prompts that worked on the first or second try. The structure follows what actually matters when you sit down to edit: cleanup first, then pacing, then platform formatting, then creative polish.
What AI Video Editing Prompts Can and Cannot Do
There is a gap between what the marketing pages say and what works in practice. When a tool claims you can "edit video with AI prompts," it usually means one of two things — and only one of them will save you time.
Type 1: Generative editing.
You upload a clip and type a prompt like "remove the background" or "apply a teal-and-orange color grade." The AI changes the pixels directly. This works for color, style transfer, and background replacement. It is inconsistent for anything that requires timing — like cutting on the beat or matching B-roll to speech.
TType 2: AI-assisted editing.
YThe AI video editor transcribes your footage, identifies pauses, filler words, and scene changes, then lets you prompt edits like "remove all ums and pauses longer than 2 seconds." This is the workflow that actually saves time. It's what allows me to finish client revisions in the same afternoon instead of the next morning.
For a deeper walkthrough of camera control specifically, I documented the workflow in how to use Gemini Omni for video editing.
How I Tested Prompt-Based Video Editing Tools
I did not guess which prompts work. I spent four weeks editing real client deliverables — social media cuts, YouTube videos, and product demos — using only prompt-based edits for the first pass. Here is the workflow that produced usable results.
STEP 1Write the Video Editing Prompt Before Filming
The most efficient workflow starts before you press record. Write a description of the final video: "60-second product demo, bright office lighting, smooth camera movement, upbeat pacing, captions in modern sans-serif font." This becomes your editing prompt later. When the footage matches the prompt, the AI has less to guess, and the first pass is closer to the final cut.
STEP 2Run a First Pass with an AI Video Editing Tool
Upload the footage to an AI tool that accepts text prompts. I used three tools side by side: LumeFlow AI, Runway Gen-4, and CapCut Pro. The first pass is never final, but it establishes pacing and structure faster than starting from a blank timeline.

STEP 3Refine the Edit with Specific AI Prompts
The mistake I made early on was vague prompts like "make it better." That wastes a generation. Each iteration should fix one specific issue: "Trim the intro to under 5 seconds," "Add a 0.5-second crossfade between each cut," "Increase audio levels by 3dB in sections below -12dB." After 3-4 rounds, the edit is usually complete. Total time: 15-20 minutes versus 3 hours manual.
STEP 4Review and Optimize for the Target Platform
Video that looks correct on a desktop timeline often has readability issues on mobile. I check the exported video on the platform where it will be published. If the text is too small or the framing is off, I return to the tool with a specific prompt: "Increase caption font size by 40%," or "Reframe subject to center-top for 9:16 format."
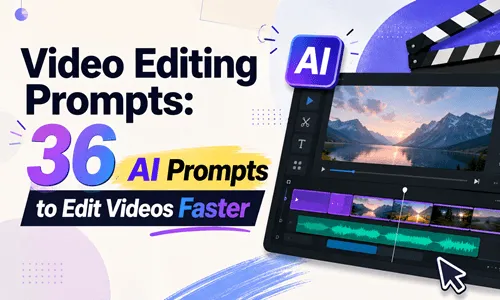
36 Copy-and-Paste AI Prompts for Video Editing
The prompts below are organized by editing task. Each one follows the structure that produces consistent results: specific action, measurable parameter, and constraint. Tool notes are based on side-by-side testing across LumeFlow AI, Runway, Gemini, and Kling AI. These prompts were validated across several popular AI video editing tools, so they work regardless of which platform you use for post-production.
1Color and Visual Style
Warm color grade for outdoor footage
Film look for interview videos
Dark, moody atmosphere for music videos
High-contrast black and white
Bright, airy look for lifestyle content
Match color across all clips
2Audio Cleanup
Remove background noise while preserving voice
Isolate voice from wind and traffic
Normalize multi-clip audio to consistent levels
Add background music that ducks under speech
Remove echo from empty-room recordings
Enhance voice clarity for narrated videos
3Pacing and Trimming
Remove silences from interview footage
Create a highlight reel from long-form footage
Make a 60-second teaser from a long video
Speed up low-movement sections without making it obvious
Remove filler words from a scripted take
Tighten the pacing of a talking-head video
4Captions and On-Screen Text
Standard YouTube captions
Word-by-word animated captions for TikTok and Reels
Lower-third name titles for interviews
Animated bullet points synced to speech
Caption style that matches brand colors
Multi-language captions for global audience
5Platform-Specific Edits
Convert horizontal video to vertical 9:16 for TikTok and Reels
Add YouTube chapters and a custom thumbnail frame
Professional edit for LinkedIn
Split a long video into Instagram carousel clips
Optimize pacing for YouTube Shorts (under 60 seconds)
Format for Pinterest Idea Pins (vertical, static frames)
6Creative Effects
Slow motion on action peaks
Subtle zoom on key talking points
Green screen background replacement
Auto-generate B-roll to cover cuts or pauses
Add a subtle Ken Burns effect to static shots
Match cut to the beat of the background music
Why These AI Video Editing Prompts Work
The prompts above follow a pattern that produces consistent results across tools: [Exact action] + [Specific number or percentage] + [What to preserve] + [What to avoid]. The more specific the parameters, the less the AI has to guess. This same structured prompting approach applies equally well to generation — if your starting point is raw footage rather than existing clips, AI movie prompts cover full-scene creation using the same [action + parameter + constraint] formula. "Remove silences" produces variable results. "Remove silences longer than 0.5 seconds without cutting off the speaker's words" produces a repeatable result.
Tool performance varies by task. Runway handles style and color prompts most accurately. Gemini handles long-form structure and multi-step instructions well. LumeFlow AI's AI tool handles end-to-end workflows — trim, caption, format — in a single prompt better than specialized tools. Test prompts on the free tier of each tool before committing to a workflow.
How to Write AI Video Editing Prompts That Work
Most prompts fail because they describe a feeling instead of an action. "Make it more cinematic" is not a prompt — it is a preference. The AI cannot measure "cinematic" or "more," so it guesses, and the result is random.
A prompt that works describes a measurable change to the video. Instead of "make it more cinematic," write "increase contrast by 20%, push shadows toward teal, add film grain at 10% opacity." The AI can execute every part of that prompt because each instruction has a number or a specific target.
The same rule applies to pacing prompts. "Tighten the edit" fails. "Remove all pauses longer than 1.5 seconds and cut filler words" succeeds because the AI knows exactly what to look for and what to remove.
When you are starting out, write the prompt as if you are describing the edit to a human assistant who has never seen a video editing tool. Be specific about numbers, positions, colors, and timing. If you cannot measure it, the AI probably cannot execute it consistently.
I keep a prompt log of every edit that worked on the first try. When a new project comes in, I copy the prompt from the log, change the numbers to match the new footage, and run it. That is the workflow that saves time — not writing a new prompt from scratch for every video.
FAQs About Video Editing Prompts
How to edit videos using AI prompts?
Upload a video file to an AI video editing tool, type a text prompt describing the edit you want, and let the AI process it. Start with simple, measurable prompts like "trim to 60 seconds" or "add captions with white text" before attempting complex multi-step edits. The more specific the prompt, the more consistent the result.
What is the best AI prompt for video editing?
There is no single best prompt because the right prompt depends on the editing task. For trimming, "remove silences longer than 0.5 seconds" works well. For color, "apply a warm color grade with orange highlights and 15% contrast increase" is specific enough to produce consistent results. The pattern across all effective prompts is: specific action plus measurable parameter plus what to preserve.
Can beginners edit videos with the help of AI?
Yes. The AI handles the technical editing steps. You need to be able to describe what you want in specific terms — "remove silences longer than 0.5 seconds" works better than "make it tighter." The learning curve is in writing effective prompts, not in learning editing software. Most users can learn the basics in under an hour.
Is AI video editing free?
Most AI video editing tools offer a free tier with limited credits or features. LumeFlow AI, Gemini, and Kling AI all have free options. For regular use, a paid plan is usually necessary. Whether the cost is justified depends on how much time the AI editing saves compared to manual editing. For creators publishing multiple videos per week, the time savings typically outweigh the subscription cost.
What is the best AI for video editing?
It depends on the type of video being edited. Runway has the best prompt adherence for visual style and camera control. Gemini handles long-form content and multi-step instructions well. LumeFlow AI is the best all-in-one option because it provides access to multiple models in one place. Try the free tiers to see which fits your workflow.
Final Thoughts
Video editing prompts change the workflow from executing edits manually to describing the result you want. The time savings are significant for repetitive tasks — trimming silences, adding captions, converting aspect ratios. The 36 prompts in this guide are the ones that produce consistent results across tools, organized by task so you can find the right prompt for the edit you need.
To test whether this workflow fits your use case, LumeFlow AI is the easiest place to start. The free tier lets you test prompts without a subscription, and you can compare results across different models to see which one handles your type of content best.
Save the prompts that work for your content. The same prompt structure — specific action, measurable parameter, preservation constraint — produces repeatable results across videos. You do not need to rewrite prompts from scratch for every video.